Mita is more than just another area in Shin Megami Tensei V. It’s a land teeming with hidden treasures, tough battles, and those elusive Miman. Collecting all the Miman isn’t just about bragging rights; it significantly boosts your gameplay experience with sweet rewards.
Miman #6
- When you arrive at the Mita Leyline Fount, look up to the northwest. You’ll spot Miman #6 chilling on a ledge. This little guy is easy to miss if you’re not paying attention, so keep your eyes peeled.
Southwest of the Leyline Fount, you’ll find some Slimes and Onmoraki guarding a treasure chest. These enemies aren’t too tough, but they can be annoying if you’re not prepared. Defeat them to snag that precious loot.
Miman #7
- Just south of the Fount, there are vending machines and a treasure chest. Behind that treasure chest is where Miman #7 is hiding. Don’t forget to grab him while you’re looting the area.
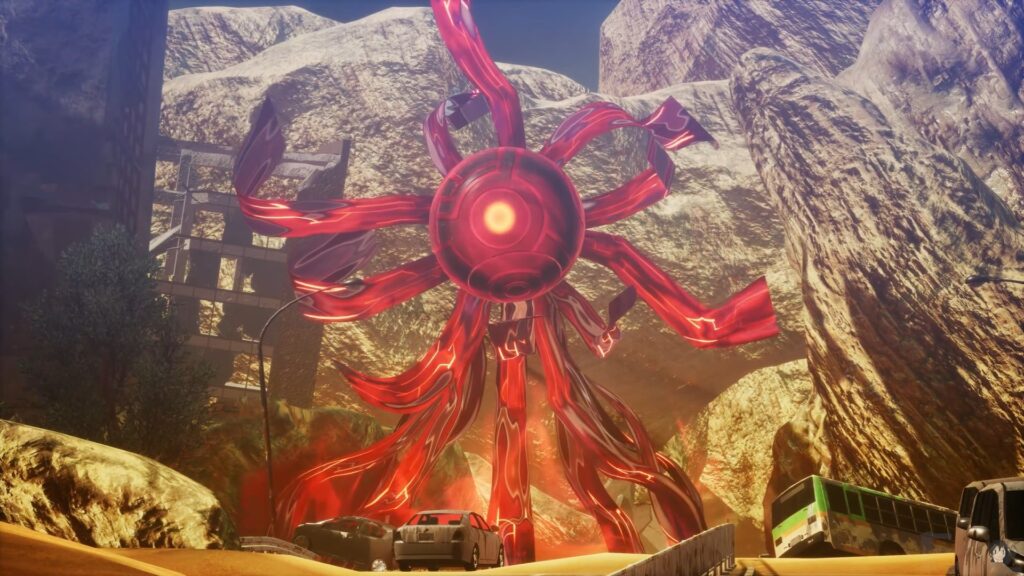
East of the Leyline Fount, Aogami will give you the lowdown on Abscesses—those giant red orbs with tentacles. These Abscesses summon enemies to fight you, so be prepared. Mandrakes are weak to fire, so bring the heat if you want to make things easier.
Miman #8
- Head straight ahead, then turn left past those rocky ledges. Climb up the smaller ledges and take another left to find Miman #8.
The Demon in Kimono will show up again, offering you a Bead. This little trinket fully heals one character, so it’s a nice bonus. Whether you accept it or not won’t affect the story.
Get ready for some fast travel! You’ll see a glowing red energy on the ground—a Magatsu Rail. It’s like a magical subway that lets you zip to different locations instantly. Hop on the Magatsu Rail and head northwest to a ruined building. Go east to find a treasure chest, then backtrack to the building. Head west to find a vending machine, then keep going until you run into some Gremlins and more vending machines.
Check your minimap for a diamond-shaped icon for the Amalgam. Look for a building with broken floors that you can use as stairs. Climb up and open the Amalgam for a sweet reward. East of where you battled the Gremlins, there’s another treasure chest waiting to be discovered. Northwest of the Gremlins, you’ll find two more treasure chests between some vehicles.
Meeting Yuzuru
Take the Magatsu Rail back down and head east. Make your way towards the objective marker, and you’ll have a dramatic encounter with Yuzuru. Don’t sweat your dialogue choices here—they won’t change the story.
Get ready for a showdown with Glasya-Labolas! Check out our handy guide on how to beat this enemy.
Miman #9
- Once you’ve defeated Glasya-Labolas, check your map and head east. You’ll find Miman #9 playing hide-and-seek behind a rock. Gotta have a sharp eye for these little guys!
Backtrack to those train tracks and head northeast. Climb up that ramp and take a right at the top. You’ll spot an Amalgam above the tunnel, just waiting to give you 50 Glory.
Miman #10
- After grabbing that loot, drop down from the platform and turn around to face the tunnel. Find the side of the train closest to the sandy wall—Miman #10 is having a little dance party in there!
Follow those train tracks northeast until you see a Leyline Fount shimmering in the distance. Cue another cutscene with our favourite Demon in Kimono!
You can choose to let her tag along or chat with Aogami about it, but either way, she’ll join your crew as Amanozako, your trusty Demon Navigator. She’ll show you how Navigators can sniff out hidden objects and lead you straight to your goals.
Right after Amanozako joins the party, Aogami will introduce you to Demon Haunts. Once you’ve explored the Haunt and chatted with your demon squad, you can head back out into the wild world of Da’at. Remember to check back at the Haunt regularly for new interactions and rewards.
