Calling all adventurers! This comprehensive guide will help you find all twelve hidden tools scattered throughout the depths of Animal Well. Ready to unlock every item? Let’s begin!
Animal Well Item Locations
Disclaimer: This guide contains spoilers for item locations and some story elements. Proceed with caution if you prefer a blind playthrough.
Firecrackers
- Location: The very first room of the game, directly in front of your character.
Disc
- Location: Exit Egg room and go northwest.
- How to Obtain: Interact with the Giant Cat statue’s mouth.
Bubble Wand
- Location: Lower left of the map (Southwest). Left of the Central Area.
- How to Obtain: Progress through the area until you reach a Giant Seahorse blowing bubbles. Use the bubbles to press the switches on the ceiling to unlock the next room. The Bubble Wand is located in a chest to the left.
Slink
- Location: Room filled with hanging vines. Upper right side (Northeast) of the blue/purple map.
- How to Obtain: The Slink is located in a chest within this room.

YoYo
- Location: South East of the map.
- How to Obtain: The YoYo is in a chest shortly after dropping down in this dark area. Use the Bubble Wand to reach the chest.
Animal Flute
- Location: Obtain 8 eggs and enter Egg room. Northwest from the center.
- How to Obtain: The Animal Flute is located in a chest within this area to the leftmost part of the room.
Lantern
- Location: Can be found later in the game in the final area. It will be unlocked once all 4 flames are collected and returned.
- How to Obtain: Collect all 4 flames and return to the central area. Proceed to the newly unlocked zone.
Top
- Location & How to Obtain: Obtain 32 eggs and enter Egg room.
Bouncy Ball (requires UV Lantern – see below)
- How to Obtain: This elusive item requires exploration and patience. The UV Lantern is a must if you want to get this item with ease.
Remote
- Location: Room under the savepoint at the starting area.
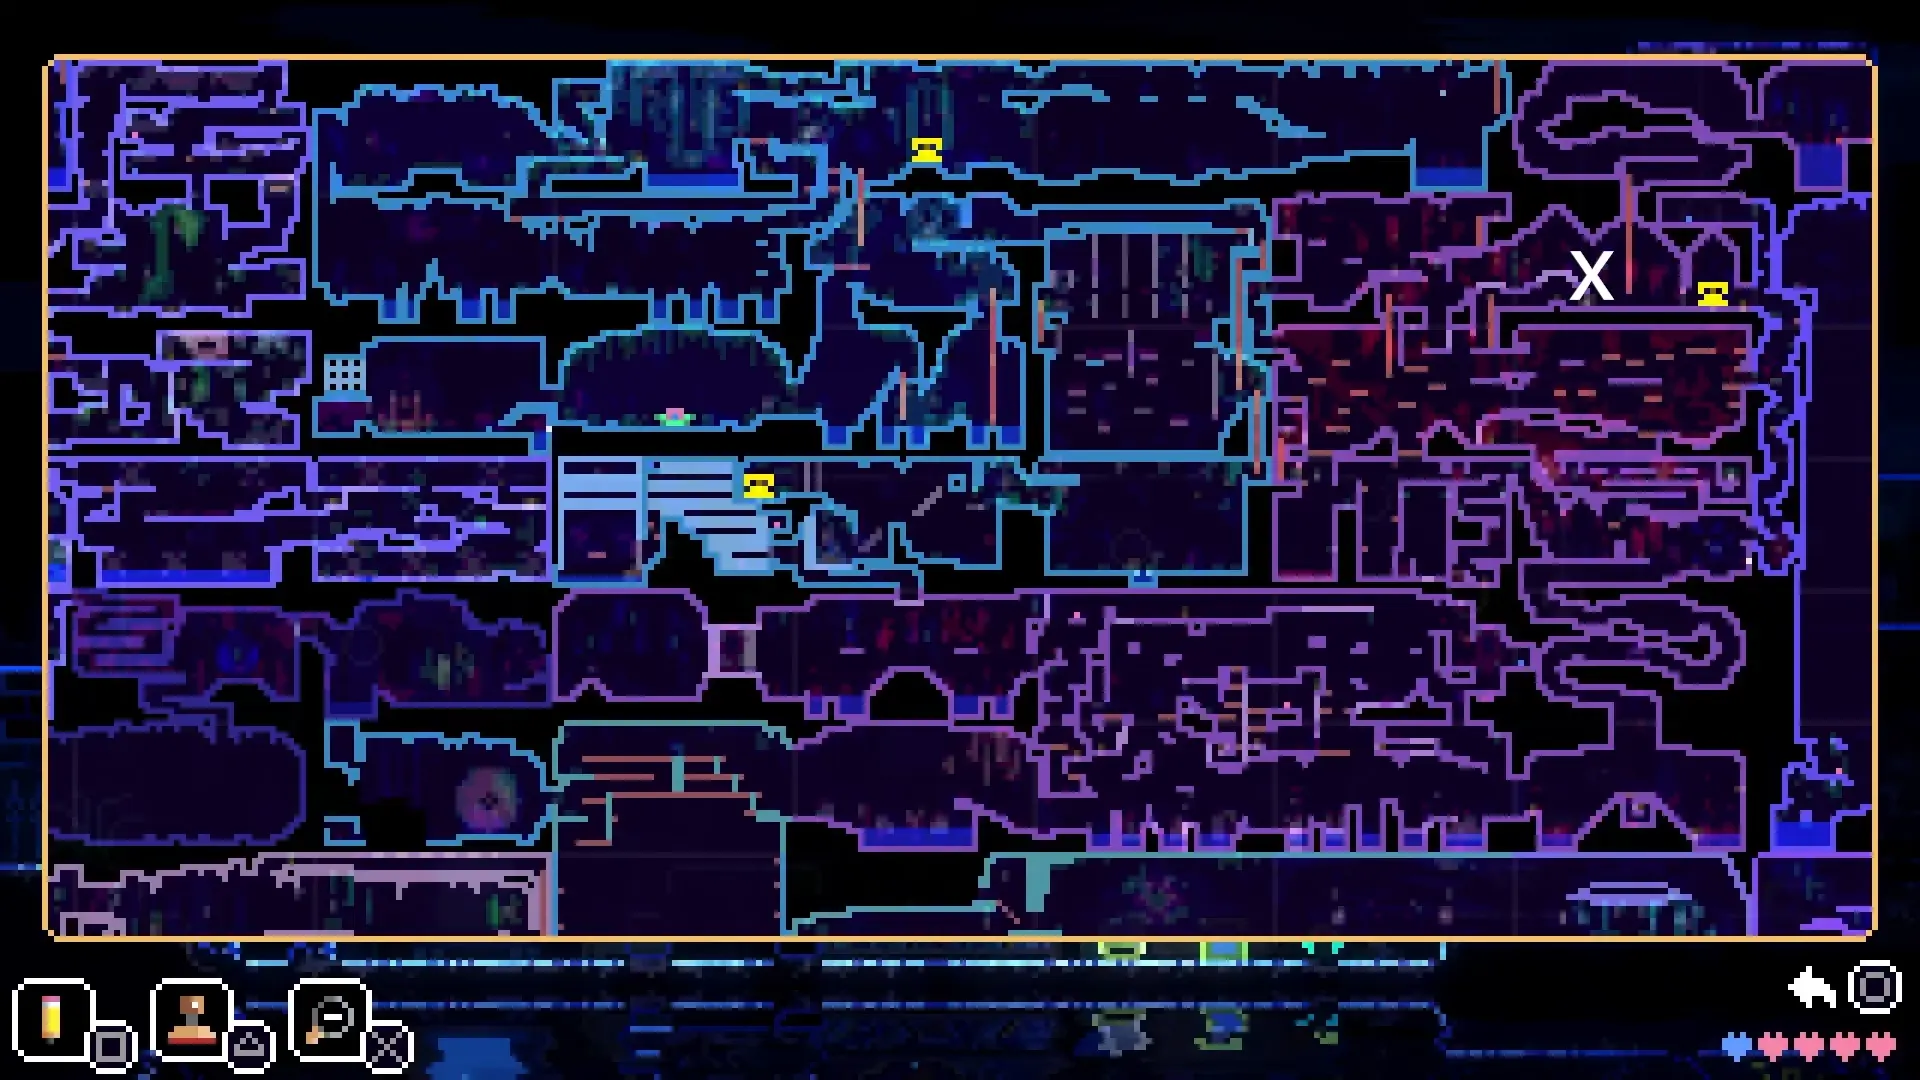
- How to Obtain: You must first defeat the Chameleon located at the northeast of the map and obtain the S. Medal. Go back to the location of the remote and look for the stone tablet in the upper right. Use the S. Medal to reach the remote.
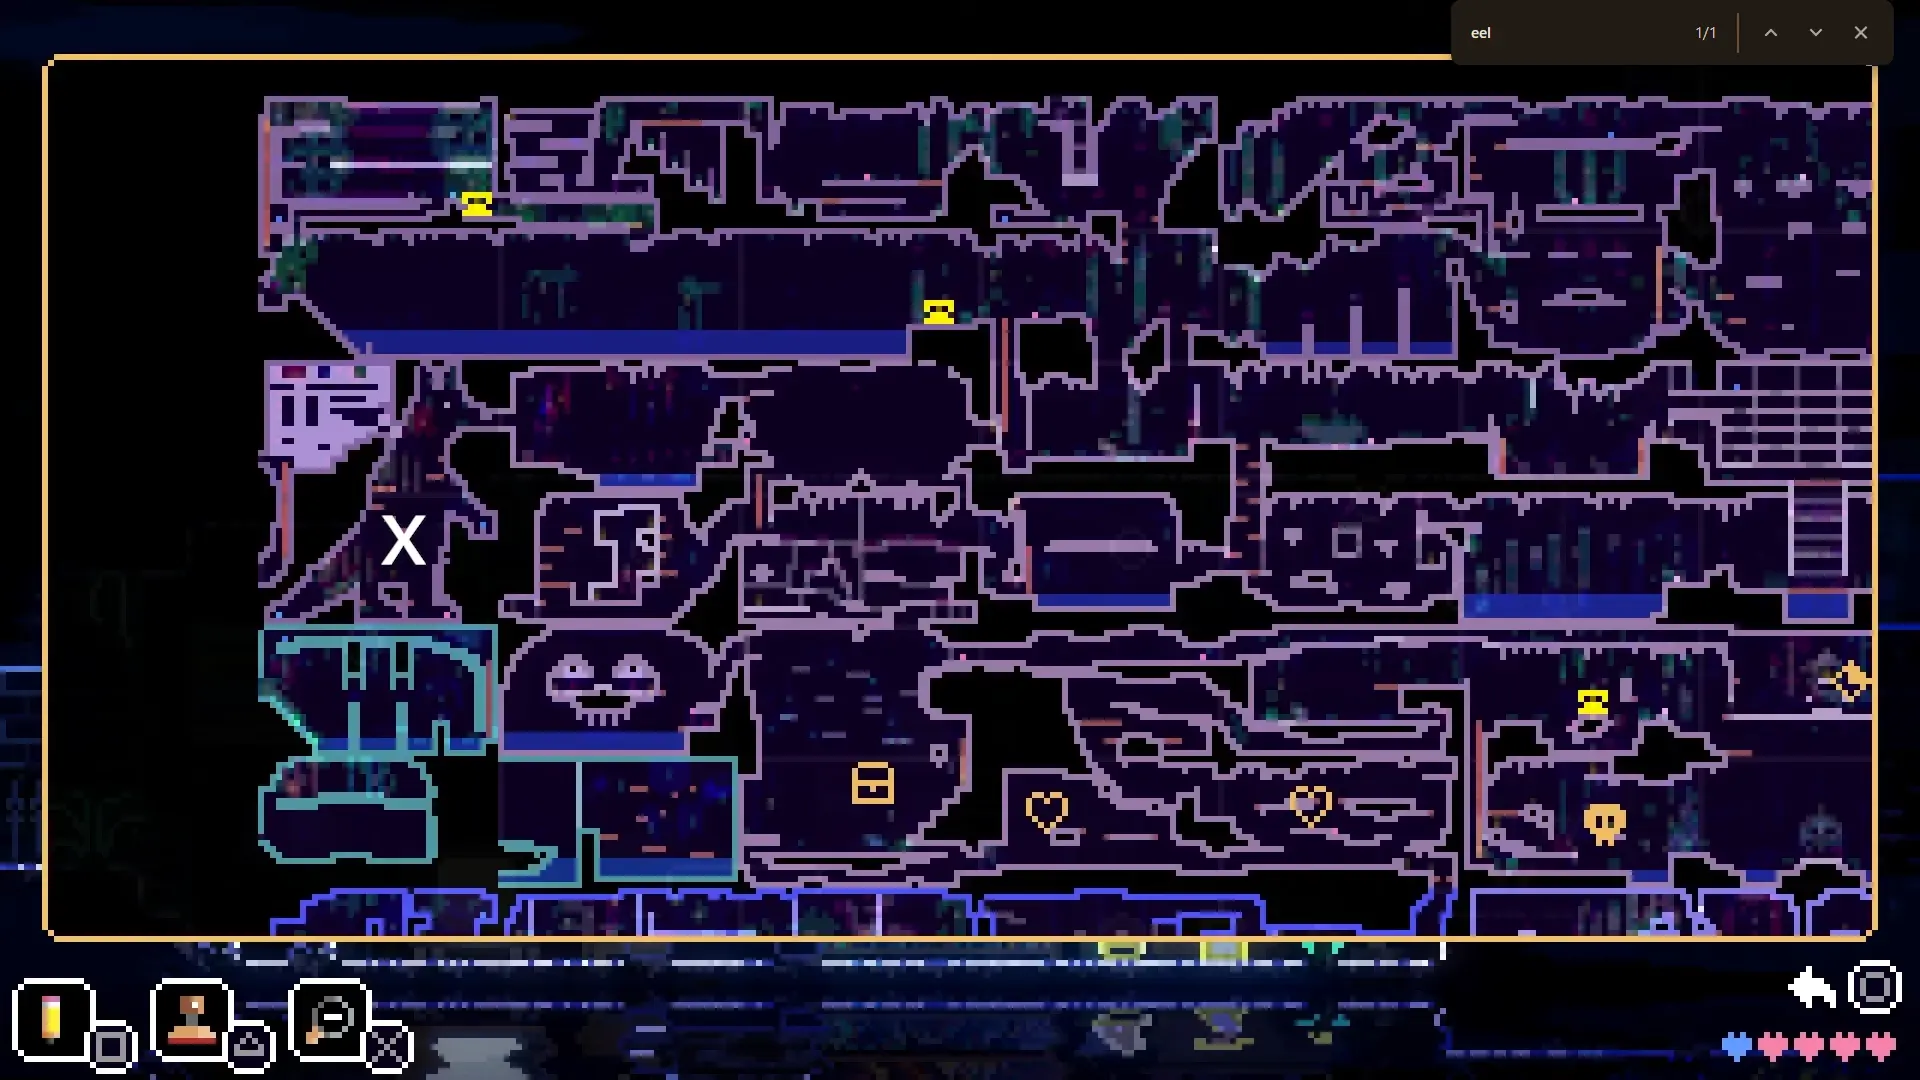
UV Lantern
- Location: Near the Seahorse area where you obtained the blue flame.
- How to Obtain: Once you lit up all the candles, return to the starting point and go left. Go through the specified tunnel to find the E. Medal. Take the E. Medal to the bottom left of the map where you fought the Seahorse. In the room to the right of the Blue Flame, instead of leaving through the fish head, find a secret passage in the top right corner. Use the E. Medal in this passage to open a new path. Drop down into the pit to encounter a large skeletal eel. Match the direction of the bubbles it releases by playing corresponding notes to freeze it. Once the fish is frozen, enter its mouth to find and collect the UV Wand.
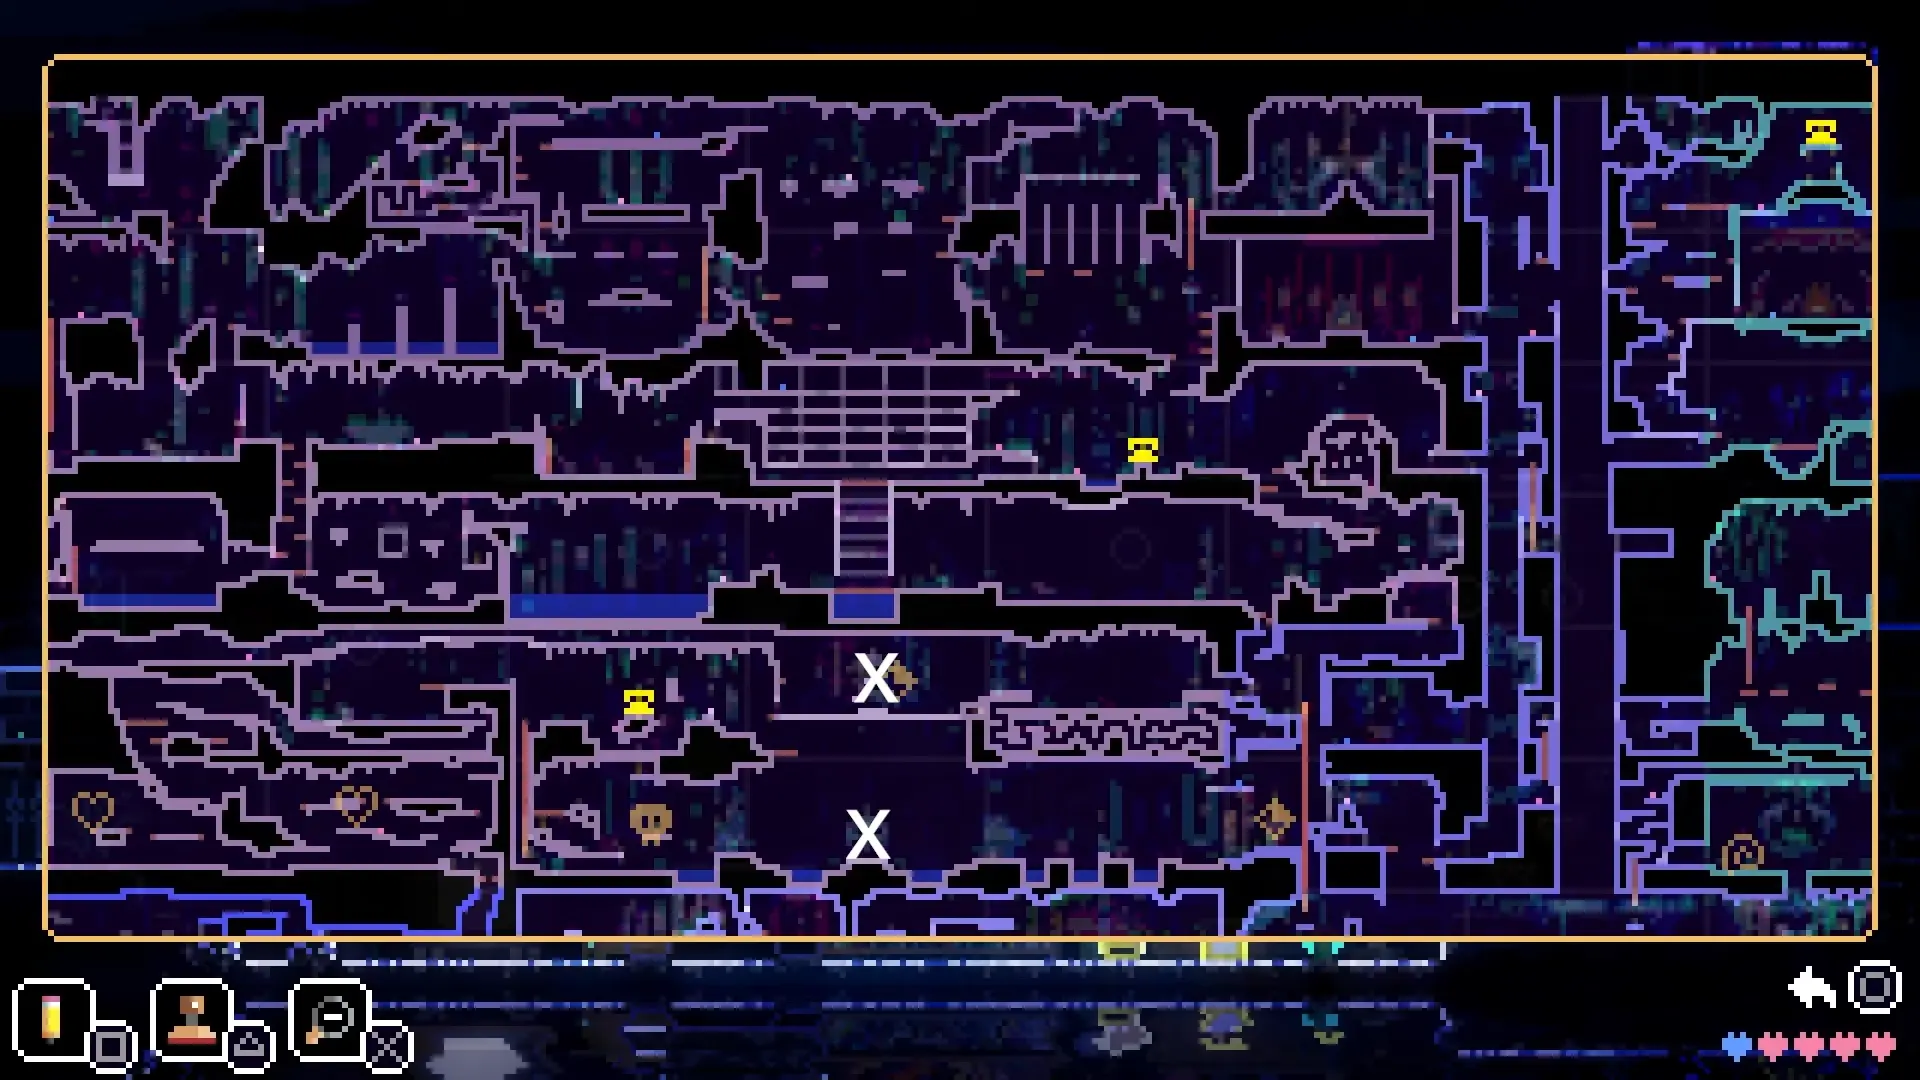
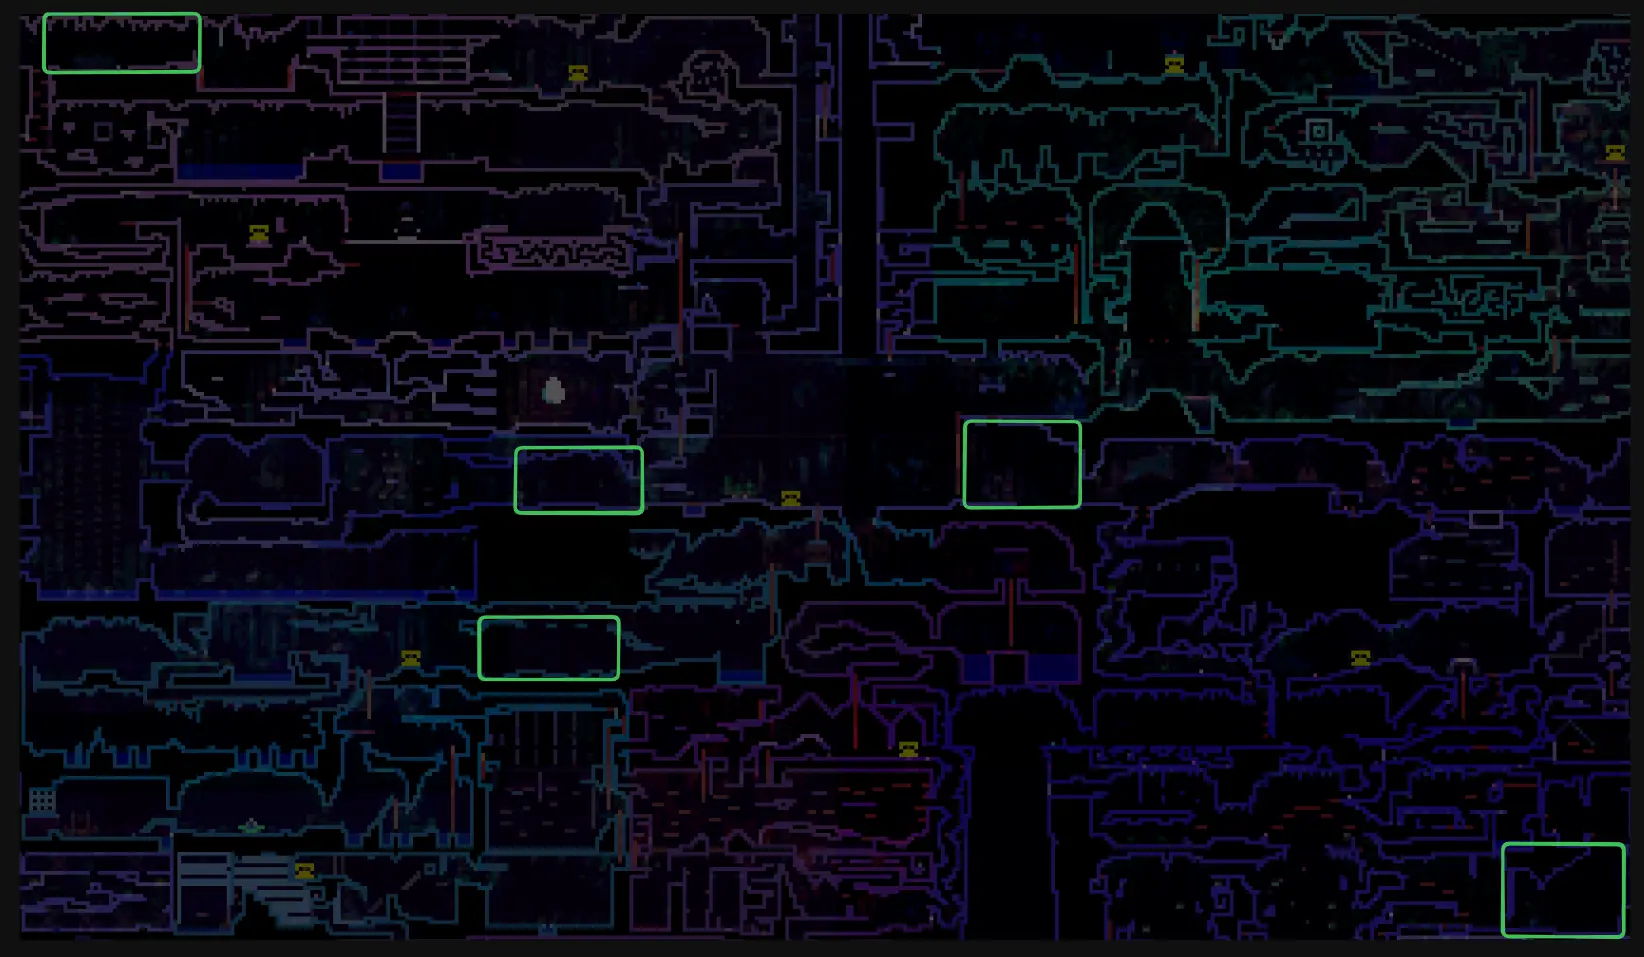
K. Medal (three parts)
- Location: Five separate locations throughout the Well. Check image below.
- How to Obtain: You’ll need to scare a mischievous Kangaroo with firecrackers in three locations. The Kangaroo will drop 1/3 of the K-Medal. Combine the three to receive K. Medal.
Bouncy Ball (using the UV Lantern):
- How to Obtain: Bring the K. Medal to the room to the left of the far northwest room on the map. Use the K. Medal to unlock the room.
General Tips
- Remember, some items require using previously acquired tools to access them. Backtracking is essential in Animal Well.
- Environmental puzzles test your skills. The tools you collect will often be the key to solving them.